Showing posts with label Eyes. Show all posts

Tuesday, May 7, 2013

[Haul] February 2013


Face
Hourglass Illusion Tinted Moisturizer "Ivory"
Kat Von D Everlasting Face Shaper Blush "Bellisima"
Physicians Formula Youth-Boosting Power "Creamy Natural"
Physicians Formula Airbrushing Bronzing Veil Bronze Booster "Light to Medium"

Lips
L'Oreal Colour Riche Caresse Wet Shine "193 Eternally Nude"
L'Oreal Colour Riche "800 Fairest Nude"
Revlon Colorstay Ultimate Suede "080 Fashionista" & "095 Finale"

Eyes
Maybelline the Falsies Volum'Express Flared "Blackest Black"
Maybelline the Rocket Volum'Express 
L'Oreal Color Infalliable "006 All Night Blue"
L'Oreal Lineur Intense Liquid Eyeliner "Black Mica"
Maybelline Instant Age Rewind Eraser Makeup "120 Creamy Ivory" & "130 Buff Beige"
Sephora Eyelashes and Eyelash Glue "Astonish"
Quo Full Lashes "804 Flirty"

Nail
Nicole by OPI "Mi Fantasia"
Nicole by OPI "Luke of the Draw"
Sally Hansen Maximum Strength Polish Remover

Etc
Veet Hair Removal Cream and Gentle Finishing Cream with Aloe Vera & Vitamin E
Veet Easy Grip Ready-to-Use Wax Strips with Vitamin E & Almond Oil - Sensitive Formula
Geo Soft Circle Lenses "Angel Brown"

Sunday, April 28, 2013

[L'Oreal] Lineur Intense Felt Tip Liquid Eyeliner 610 Black Mica & 630 Earthen Rock Brown


Size: 0.05 fl oz. or 1.5ml
Price: C$10.99 (+tax)
Type: Liquid Eyeliner

Availability
This product is available any local drugstore that sells L'Oreal's products.

Ingredients


Product Description


For dramatically bold eyes looks L'Oreal presents Lineur Intense's felt tip applicator allows you to create delicately thin or dramatically bold lines.
- All day wear up to 8 hours. - Won't fade away.
- Ophthalmologist tested. - Fragrance-free.

Application Tips: Shake well before each use. Glide tip along outer lash line, pressing lightly for thin line and increasing pressure for thicker line. Replace tip in ink well to remoisten if desired.

For a delicately thin line: Using the tip of the applicator, draw a thin line along lash line from inner corner of eye working outwards.

For a more bold eye look: Using the tip of the applicator, draw a thin line gradually widening the line by angling the tip from the middle of the lash line to outer corner, flicking up at the end of lash line for a "cat eye" look.


Container/Packaging
The product comes in a golden pen-shaped container. The felt-tipped applicator works quite well as the handle is made quite narrowly. The only downside of this pen is that it has no label telling what the name of this product actually is (except for the tiny little label that is not made to be read).


Product

The actual product glides on quite smoothly with the applicator. Although the applicator seems to soak up a lot of product, it is quite comparable to Lancome's Artliner. While it is oil-proof and water-resistant, it is definitely not smudge-resistant. It neither flakes nor fades after 12+ hours of wearing. 

610 Black Mica is highly-pigmented and opaque black.
630 Earthen Rock Brown is also highly-pigmented and opaque muddy brown.


Scent
It smells like ink, but it is totally undetectable once applied.


Would I Recommend This Product? 
I would. I've been a loyal customer of Lancome for their Artliner and Estee Lauder for their Double Wear Zero-Smudge Liquid Eyeliner, but I would have to say that the Artliner and the Lineur Intense are the winners of the game. After I finish my Artliner and Double Wear, I will stick with Lineur Intense.


Pictures


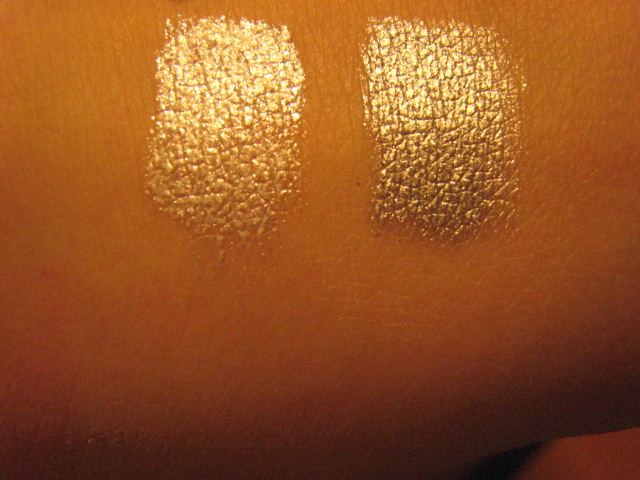
Heavy swatch of Black Mica (Left)  |  Heavy swatch of Earthen Rock Brown (Right)
Black Mica (Left)  |  Earthen Rock Brown (Right)

Tuesday, April 17, 2012

[LOTD] Everyday Neutral Eye Makeup


I'm totally in love with this look. While your eyes still look accentuated, 
you can play with almost any shade of lipstick, whether vibrant or muted.

For a formal occasion, I tend to go with Revlon 001 Pink Truffle (review) and
Lancome Rouge in Love 230M Rendez-Vous or NARS Flamenco to party.
With Lancome Pale Lips, this look can even become nude.

Therefore, this look can be very versatile depending on your lip colour.

Please let me know what you think!


Products Used:

PrimerUrban Decay Eyeshadow Primer 
Eyeshadows: TheBodyNeeds2.com Elegance,
Urban Decay Smog or MAC Roasted Chestnut (I pressed the pigment myself)
(I don't remember which shade I used on the outer corner!)
MAC Glitz & Blitz 


xoxo,
cynthia.


Saturday, March 17, 2012

[LOTD] Tough as Taupe & Hustle from Naked Palette Look


I was in rush to my lecture and it took me less than two minutes to complete this look. 
I never wore the same look but after this one, this became my most favourite!


Products Used:
MAYBELLINE Colour Tatto 24h Eyeshadow : Tough as Taupe 
URBAN DECAY Naked Palette - Hustle
MAC Blitz and Glitz

xoxo
cynthia.

Thursday, January 19, 2012

[Make-Up Tutorial] Mysteriously You


It's true that I've been posting the product reviews lately but I'm trying to shape my blog in a more organized manner.... so here is my new look: Mysteriously You.


Let's Start :)

- Apply some eyeshadow primer for a significant enhancement in both pigmentation and lasting power.

- Mix two shades (the black one on the top right corner and the taupe-brown which is the one under the black) and apply them on the outer corners of your eyes.


- I also used a soft peachy shade (the third one from the left on the second row) on the inner corner and blended all three together to achieve a gradated effect.


- Actually, it looks much more pigmented and more black but I think it still looks alright.
It doesn't look like so but, at the end, the look appeared to be more dark chocolate-taupe shade with some light gold silver. 

I also added the taupe-brown shade on the corners underneath. 


(and.. if you look really close, you can see some some fallouts) 


- I applied MAC Glitz and Blitz and Maybelline's the Falsies Volum' Express Waterproof mascara to finish off the look. 


And this is it! 

Just to share some personal thoughts, I'm having a rough time in school (since this is my fourth year), so tutorials will come in the slower pace than usual but I still hope you enjoyed the tutorials. 

If you liked this tutorial and want more of these, please subscribe to my blog or follow me on twitter @CDistrict900212. Thank you and I'll talk to you all soon!

xoxo
cynthia.

Wednesday, December 7, 2011

[Tutorial] Bold Navy Cat-Eye Look


1. Apply a primer all over your eyes. 


2. Use either White As Snow or Silver Sleet as on the inner half of the lid.
Mix your pigments with mixing medium the pigment as much as possible, if you are using White As Snow.
The silver glitter falls everywhere. Take a blending brush and blend most of it out so that it looks natural
but if you want a bit more of that drama to go on, do not blend it out too much.
I also applied White As Snow on the lower centre lid. 


3. Apply Blue Sky and create that cat-eye shape on the outer corners of your eyes.
Blend Blue Sky on the outer half of the lid and blend well with White As Snow.


4. Keep the lines sharp and crisp. Wipe off any excess.


5. Line your upper lashline and curl your lashes. I skipped the lower lashline because it was too much drama for me but it is totally up to you if you want that full drama. 


xoxo
cynthia. 

Tuesday, November 22, 2011

[Review] MAC Dazzlesphere Smokey Blue Pigments + Swatches


I finally uploaded a video on Youtube about MAC Dazzlesphere! pigments :D
I definitely sound like a robot but I hope I'll get better as the time goes by...


I know that it has been a long time since I wrote a review on products so I want to start by apologizing. 
I saw great comments on the Dazzlesphere! and I was really obsessed to get my hands on them. However, the only thing that actually attracted my attention was the Smokey Blue Ornament.


White As Snow & Silver Sleet

Winter Sky & Dark Moon


I hope these swatches and review was helpful :)

xoxo
cynthia.

Sunday, September 18, 2011

[L'Oreal] Color Infalliable Eyeshadow in 009 Permanent Kaki


As a treat for myself for sacrificing my weekend to GRE prep course, I tested out and purchased L'Oreal's Color Infalliable in 009 Permanant Kaki. But...


Are you serious? I really wanted to get rid of this khaki sticker on the lid. It makes the eyeshadow look 100 times cheaper than tis price while it is $5 cheaper than a MAC eyeshadow! L'Oreal, I seriously advise you to take it off! Engrave it like the L'Oreal mark on the side of the lid. Print it directly on the lid. Seriously, do something about it!

Now, the back of the eyeshadow is rather cute, even better than the ones at MAC's.


This is the look of Color Infalliable eyeshadow. This has very warm khaki tone but works for both warm tone and cool tone.


Don't you have think this is a dupe of Chanel's Illusion D'Ombre in Epatant? I'll show the comparison between the two, but in the mean time, let's discuss the pro's and con's.

For PROS,
-  009 Permanant Kaki is  a really wearable shade at an inexpansive cost .
The whole collection of Color Infalliable does. I didn't buy the other shades because they weren't working for me and there were only five shades available from Shopper's Drug Store (at least from where I went). However, there are a huge range of shades unlike other drugstore selections on the website.


- They are velvety and smooth.
It's not like Illusion D'Ombre's moist and creamy but rather soft and velvety. It's still feels like Illusion D'Ombre though. The shade has amazing metallic sheen to it that is not overexaggerated.

For CONS,
- The eyeshadow doesn't last long and doesn't stand friction too well
Because the eyeshadow is made out of pressed powder, it doesn't last as long as Illusion D'Ombre. Well, I guess the price differentiation really matters after all.

- The pot ( that's worth $12 + tax ) is too small and design looks cheap
This eyeshadow is $5 cheaper than MAC eyeshadows but it's the pot is too shallow and contains very little product.

But other than that, I'm pretty fond of the shade and the eyeshadow overall :D


xoxo
cynthia.