Showing posts with label Eyeshadow. Show all posts

Tuesday, April 17, 2012

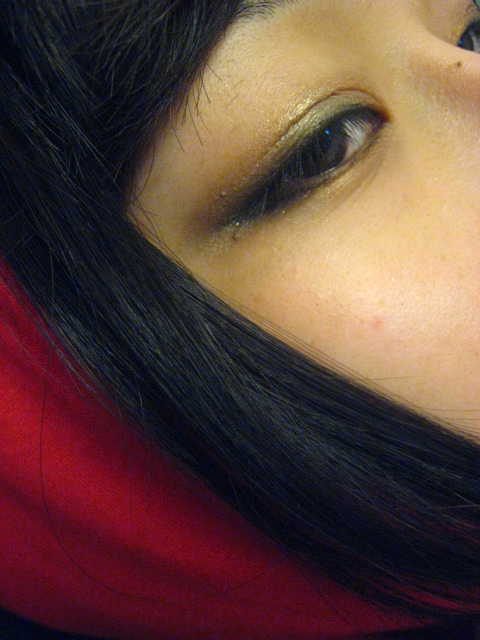
[LOTD] Everyday Neutral Eye Makeup


I'm totally in love with this look. While your eyes still look accentuated, 
you can play with almost any shade of lipstick, whether vibrant or muted.

For a formal occasion, I tend to go with Revlon 001 Pink Truffle (review) and
Lancome Rouge in Love 230M Rendez-Vous or NARS Flamenco to party.
With Lancome Pale Lips, this look can even become nude.

Therefore, this look can be very versatile depending on your lip colour.

Please let me know what you think!


Products Used:

PrimerUrban Decay Eyeshadow Primer 
Eyeshadows: TheBodyNeeds2.com Elegance,
Urban Decay Smog or MAC Roasted Chestnut (I pressed the pigment myself)
(I don't remember which shade I used on the outer corner!)
MAC Glitz & Blitz 


xoxo,
cynthia.


Saturday, March 17, 2012

[LOTD] Tough as Taupe & Hustle from Naked Palette Look


I was in rush to my lecture and it took me less than two minutes to complete this look. 
I never wore the same look but after this one, this became my most favourite!


Products Used:
MAYBELLINE Colour Tatto 24h Eyeshadow : Tough as Taupe 
URBAN DECAY Naked Palette - Hustle
MAC Blitz and Glitz

xoxo
cynthia.

Thursday, January 19, 2012

[Make-Up Tutorial] Mysteriously You


It's true that I've been posting the product reviews lately but I'm trying to shape my blog in a more organized manner.... so here is my new look: Mysteriously You.


Let's Start :)

- Apply some eyeshadow primer for a significant enhancement in both pigmentation and lasting power.

- Mix two shades (the black one on the top right corner and the taupe-brown which is the one under the black) and apply them on the outer corners of your eyes.


- I also used a soft peachy shade (the third one from the left on the second row) on the inner corner and blended all three together to achieve a gradated effect.


- Actually, it looks much more pigmented and more black but I think it still looks alright.
It doesn't look like so but, at the end, the look appeared to be more dark chocolate-taupe shade with some light gold silver. 

I also added the taupe-brown shade on the corners underneath. 


(and.. if you look really close, you can see some some fallouts) 


- I applied MAC Glitz and Blitz and Maybelline's the Falsies Volum' Express Waterproof mascara to finish off the look. 


And this is it! 

Just to share some personal thoughts, I'm having a rough time in school (since this is my fourth year), so tutorials will come in the slower pace than usual but I still hope you enjoyed the tutorials. 

If you liked this tutorial and want more of these, please subscribe to my blog or follow me on twitter @CDistrict900212. Thank you and I'll talk to you all soon!

xoxo
cynthia.

Tuesday, November 1, 2011

[Tutorial] The Heart of Eternity Make-Up Tutorial


Hi everyone! I was requested (by my friend) for a quick and inexpansive party look that will suit her blue dress. I don't really wear blue eyeshadows because my face is very warm-toned; however, this was a special occasion and I decided to try anyway.


Information and Picture Credit of "The Heart of Eternity":
http://mostexpensivediamond.org/


Let's begin!


Apply a primer first and use L'Oreal Colour Infallible Eyeshadow in #15 Flashback Silver in the inner corners of your eyes and just below your lash line. This will really give that pop to your eyes. One warning, though, is that this shadow has quite a bit of fall-out so you will want to reduce the amount by wetting your brushes before applying eyeshadows.


Next, take MAC's Blue Storm pigment and apply it on the outer corner and just above the crease (and if you don't want such sharp edges like my look, then blend the sharp edges of the eyeshadows). Blend the center of the eyelid with a blending brush so that Blue Storm and Flashback Silver can create a nice gradation.


Finish the look (yes, it's almost already finished) with MAC Blitz & Glitz eyeliner. Since it is a party look, create a wing to accentuate the eyes. Connect the wing with the lower eyelash and make the lower wing to fade away.


And that's it for the eyes! To move on, I will avoid using any bright red eyeshadow to avoid looking like a clown. Only clowns wear blue eyes, red noes, red cheeks and red lips. Instead, I'll use bronzer to give some contouring (FitMe! in Light Bronze).

Same logic goes for the lips. My advice is to use warm-toned nude lipstick.


Now, this is the final look of "The Heart of Eternity". According to mostexpensivediamond.org, this is the eighth most expansive diamond. This 27.64 carats (5.528g) daimond from South Africa is rated as Fancy Vivid Blue. This make-up is as illuminating and breathtaking as the diamond is.  Have fun :)


xoxo
cynthia.

Sunday, October 2, 2011

[Tutorial] Trip to El Dorado


Hey everyone! I decided to upload a tutorial named "El Dorado". As I mentioned in previous posts, I accidentally deleted my "how-to" photos but I used GL02 (Missha The STyle Metallic Shadow) on the inner corner of my eyes and finished it off with MAC's Woodwinked on the outer corner. If you want a look with great depth, then apply Woodwinked to define crease and outer corner and blend it upwards to the crease. I used gel eyeliner to finish off. MAC: Blitz & Glitz.


I also added some Missha eyeshadow on the centre of the lower lashline.


Sorry for the rush-through tutorial but these pics were the only ones I could restore.
Everything else was lost :P

xoxo
cynthia.