Tuesday, December 13, 2011

[China Glaze] Holiday-Themed Nail Polishes & Recommended Holiday Look


I made small purchases from a website in search for my holiday nail polishes.


They came in a small box like so.


I was surprised to see how nicely secured the bubble wraps were. 


I also received a candy cane :D


These are the nail polishes that I'm going to review about...


Ingrid
This is a transparent milk chocolate shade nail polish that requires more than one coat.
 I was expecting quite much about this nail polish so I wasn't totally satisfied with it.
Second coat looks much opaque.


Nova
I wasn't planning on making this purchase because it alone looked....... out of space...?
Well, I guess that's why this is called "Nova" (cheesy joke!) but what I meant was that 
it wasn't working alone. It needed something. 

To give you a short description of this nail polish, 
it is translucent nail polish with large glitter particles. 
If you are planning on wearing this alone, two or even three coats will be necessary.
Make sure to add a top coat because it feels a bit rough :( 


Tinsel Town 
This is the main reason why I ended up making these purchases :D
It is a light black nail polish with small and medium-sized glitters.
What really looks wonderful is that, after applying two coats of Tinsel Town, 
your nails will look like miniatures of starry winter night sky!

(Two coats are enough but three can't go wrong!)


"C-C-Courage" (What a cute name!)
This is the only nail polish that I haven't tried.
It's a dark violet nail polish with silverish violet glitter.


Suggestion for Holiday Look


Have Two coats of Tinsel Town
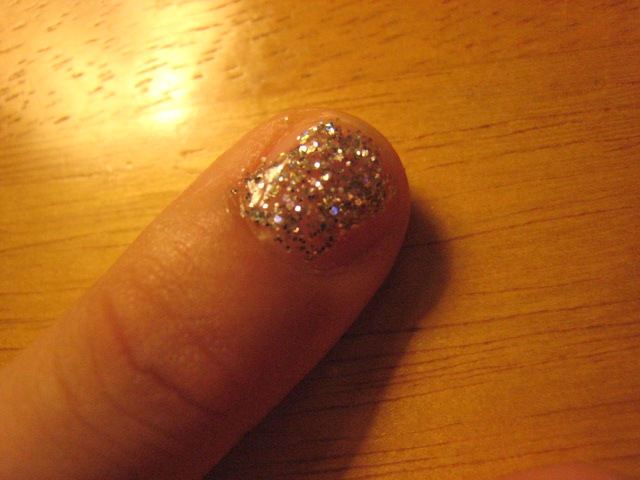


And add a coat of of Nova on top


and... i didn't know i made a mistake until i reviewed these pictures...


And that's what I got : 
Two coats of Tinsel Town and one coat of Nova
(Doesn't this look nice? Two coats of Tinsel Town look sparkly enough 
with small and medium-sized glitter particles but another coat of Nova 
gives that extra dimension with its large glitter.) 


I bought Nova just because it came as one of the look-alike's or recommendations 
but uhhhh....... I guess some people reviewed about this already.....?
(As I finished writing about this recommendation, I searched on the internet and..damn..)
Opps.. so I guess goes to the ones who didn't know this technique....?
But this really suits the holiday theme so sorry if this was a review for you :(


I hope this can give you some idea of what to wear for christmas!
I'll come back with more reviews and tutorials so stay tuned!


xoxo
cynthia.

Wednesday, December 7, 2011

[Tutorial] Bold Navy Cat-Eye Look


1. Apply a primer all over your eyes. 


2. Use either White As Snow or Silver Sleet as on the inner half of the lid.
Mix your pigments with mixing medium the pigment as much as possible, if you are using White As Snow.
The silver glitter falls everywhere. Take a blending brush and blend most of it out so that it looks natural
but if you want a bit more of that drama to go on, do not blend it out too much.
I also applied White As Snow on the lower centre lid. 


3. Apply Blue Sky and create that cat-eye shape on the outer corners of your eyes.
Blend Blue Sky on the outer half of the lid and blend well with White As Snow.


4. Keep the lines sharp and crisp. Wipe off any excess.


5. Line your upper lashline and curl your lashes. I skipped the lower lashline because it was too much drama for me but it is totally up to you if you want that full drama. 


xoxo
cynthia. 

Friday, December 2, 2011

Haul & Make-up Tutorial are Coming Soon...

I have four finals in three days, so I promise that I'll start posting things on Thursday (I PROMISE!!!!).
Just to give you an idea of what's coming, I'll give you the list : 
China Glaze, Urban Decay, Jack Black, and Biotherm :)

xoxo
cynthia.

Wednesday, November 30, 2011

[Tutorial Preview] Natural Holiday vs. Dramatic Holiday :)


I created two make-up tutorials:
one which is more natural
and another which is more dramatic :)


stay tuned for the review tomorrow!


xoxo
cynthia

[Weight Loss Story] How much I Lost So Far...

I'm having my final exams and essays, so I'll write this real quick (and I'll start writing my weight loss story again). I still exercised and ate as little as possible though... And, as I confessed, I started out at 70kg (154pounds...ish) a week ago (or so). 


And... I'm at 66kg (148~149pounds) :D haha I'm so happy to see some progress!
I hope everyone feels motivated to start working out!


xoxo
cynthia.

Sunday, November 27, 2011

Kim Yeon Woo is the BEST

No Infringement Intended

Kim Yeon Woo (김연우) is one of the most celebrated singer in Korea.
He came back with a new album "Mr. Big". The song I posted is called "Loved You...Good Bye" (사랑했다 안녕) in direct translation. Listen to this :)... you'll fall in love with him.

xoxo
cynthia.

Tuesday, November 22, 2011

[Review] MAC Dazzlesphere Smokey Blue Pigments + Swatches


I finally uploaded a video on Youtube about MAC Dazzlesphere! pigments :D
I definitely sound like a robot but I hope I'll get better as the time goes by...


I know that it has been a long time since I wrote a review on products so I want to start by apologizing. 
I saw great comments on the Dazzlesphere! and I was really obsessed to get my hands on them. However, the only thing that actually attracted my attention was the Smokey Blue Ornament.


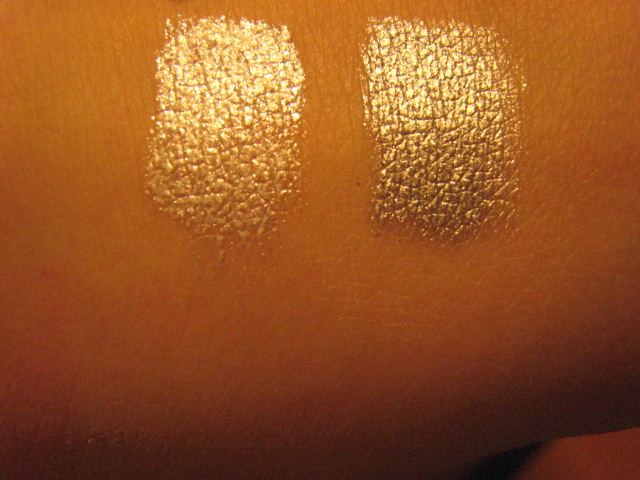
White As Snow & Silver Sleet

Winter Sky & Dark Moon


I hope these swatches and review was helpful :)

xoxo
cynthia.

[Weight Loss] Before Posting Anything About Day 5


Previous Posts on Weight Loss:
http://benefitter.blogspot.com/2011/11/weight-loss-story-before-i-begin.html
http://benefitter.blogspot.com/2011/11/weight-loss-day-1-meals-exercises.html
http://benefitter.blogspot.com/2011/11/weight-loss-day-2-meals-exercises.html
http://benefitter.blogspot.com/2011/11/weight-loss-day-3-meals-exercises.html
http://benefitter.blogspot.com/2011/11/weight-loss-day-4-meals-exercises.html


Sorry for being so long gone! 
I couldn't follow up with this meals & exercises for two days but I will come back to the routine.
I'll count today (22nd) as Day 5 and continue on with the dietary meals and exercises, so stay tuned!


xoxo
cynthia.
Sunday, November 20, 2011

[Haul] MAC, NYC, Veet, Vaseline, Febreze

hey everyone, i'm writing my third post of the day (and super proud of myself)... and it's about my haul!
i went to get a new MAC Bronze since it shattered into pieces (and fell flat on the ground) and i ended up purchasing a lot of other products that i've been dying to try out : ( so here they are!


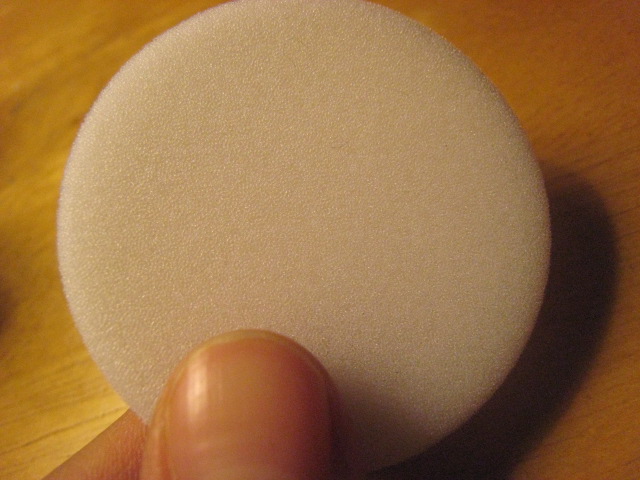
NYC smooth skin bronzing face powder in 720A Sunny
(with its useless and cheap-looking sponge...)


Rimmel Hide the Blemish Concealer in Soft Honey


MAC Club
(on the light, it looks emerald green and in the shade, it looks brown.. how cool is that?)


MAC Bronze


MAC Fix+


MAC 224 Blending Brush


MAC Dazzlesphere! Blue Ornament 


 Vaseline Cocoa Butter 


VEET Ready To Use Wax Strips For Face


Febreze Cinnamon Sugar & Home Candle (limited edition)


and... i guess that's...it...?
i spent about $200 and they just flew out of my hand, 
thanks to MAC... i hope you enjoyed and i'll do my reviews on them asap!

xoxo
cynthia.

[Tutorial] Taupe-Brown-Gold-Emerald Make-Up Tutorial....?


hey everyone, i want to mention that this makeup tutorial is inspired by MAC eyeshadow called 'club'.
it looks like emerald-forest green under the light but it looks deep chocolate brown when in the shade.


i don't know how to name this look but it's quite mysterious yet effortlessly beautiful.
So if you want to achieve this look, then keep reading!


1. Start by adding UD Eyeshadow Primer Potion.


2. Apply NYX 615 Slate all over your eyelid as a base colour.


3. Then take MAC Old Gold and apply it to the inner corner & the centre of your eyelid.
(Make sure to use it with a mixing medium because it really brightens up the colour of Old Gold)


 4. Add MAC Woodwinked on the lower corner lashline but blend it out on the middle. 
(or whatever that will give that nice gold shimmer) 


so this is the final look!


it looks emerald green and brown...


but in the light, it looks gold brown...!


or silvery brown... and yes, these shades come from the same make-up.
i swear.


so i hope you enjoyed this tutorial and want more make-up tutorials, 
please follow me on twitter or subscribe to my blog :)


xoxo
cynthia.