Monday, October 31, 2011

[Tutorial] Haunted Little Red Riding Hood Make-Up Tutorial


Hey everyone! I hope you all are preparing well for Halloween.
I had a Halloween party last Friday and this was my last minute make-up but I had great compliments from my guy friends so I decided to share this tutorial.


Let's Begin!


Here I am, either barefaced or with very minimal make-up (i.e., base & eye primer).
(yes, I'm assuming this is the one without make-up 
because I'm covering my face with my hair...lol) 


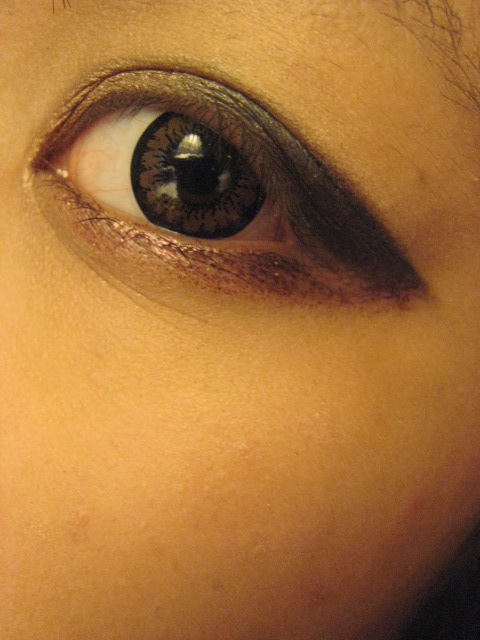
I applied MAC's Woodwinked on the inner corner and Forest Green Pigment on the outer corner. I blended Forest Green with a dry brush without mixing medium and it turned out to be a beautiful daily look (and this is what I wore to work). However, we're not aiming for a daily look, are we?


Now, this is what you're willing to get.
A metallic forest green.


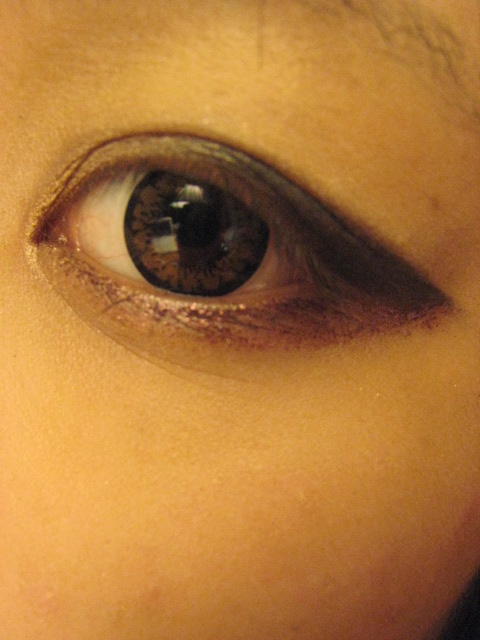
Now, I wet my brush with mixing medium and 
topped the daily look with more of the Forest Green to accentuate the eyes.
Now, this is completely optional but I made that sharp edges on the outer corners and intentionally didn't blend them for sharp and defined look 
(if you are not a follower of mine, I do that all the time xD).
If you want, you can do so.


Next, I wanted to look haunted since it was Halloween party (but not to the point where I look trashed), so I took Reflects Blackened Red glitter and mix it with Missha's Magic Eyechange to apply them on the lower lash line.


(And, again, this is optional but I mixed Woodwinked with Colour Infallible in #015 Flashback Silver on the inner corner of my eyes to brighten the inner corners of my eyes)


I used MAC's Glitz n Blitz and Maybelline NY Volum' Express the Falsies to finish off.

And that's it for the eyes :D


Products Used:


I wanted the overall look to appear very natural since eyes are so accentuated,
so that the focus is on the eyes, not here and there. I still added minimal amount of bronzer on my cheeks and jaw area (very very minimal so that it shapes the face). 


I hope this tutorial was helpful and if you want more make-up tutorials,
please follow my blog and/or my twitter @CDistrict900212 :)
Thank you so much and I hope you have a wonderful Halloween!

(+)

This is my look and sorry for the blurriness but
this is the only picture I could get without others in the photos.
I'll come up with more pictures. Stay tuned!


xoxo
cynthia.


Sunday, October 16, 2011

[Haul] Drugstore Make-Up & Thebodyneeds2.com & Starbucks Haul

I purchased some drugstore make-up products
including two shades of pigments from NYX, Oro Pearl and Rust Pearl. 
Oro Pearl is a bronzy-gold shade and Rust Pearl is a Red Fuchsia shade.

Drugstore Make-Up Products


NYX 721 Soft Fuschia (yes, Fuschia, not Fuchsia)
This lip pencil was surprisingly soft and hydrating,
definitely comparable to high-end make-up lip pencil products.
The downfall of soft and hydrating lip pencil/liner is always its lack in constancy.
Yet, I still loved the wide range of choice in shades and the product itself.


NYX Ultra Pearl Mania in Rust and Oro
Jangsara had photos of these swatched
(http://jangsara.blogspot.com/2010/05/gosh-nyx-swatches.html)


NYC Blushable Creme Stick in #649U Berry New Yorker.
This one is also very hydrating and creates a naturally dewy finish.


L'Oreal New Magic Smooth Makeup Studio Secrets #516 Nude Beige

I wasn't going to make this purchase but I tested it out and it felt something like foamy mousse. It literally "melted" on my skin. I'll have to use it more in order to deliver an appropriate experience with it but I seem to be in huge favour of it already.


Maybelline New York Fit Me! Bronzer in Light Bronze.


www.thebodyneeds2.com


I recently purchased MAC pigments from thebodyneeds2.com.
They arrived in a yellow envelope just as pinkyparadise.com did but without bubble wraps in side. Instead, the containers were safely wrapped in thin white styrofoam. 


Here are the nine pigments I purchased. 
They were all nicely labelled at the back.


Dark Soul                                   Blue Brown


Violet                                        Full Force Violet


Forest Green (the photo came out really dark so I included how it looks on the daylight)


Brash & Bold                                 Old Gold


Antique Green

And I guess I'm missing chocolate brown. I'll upload the picture soon!


And while I was writing this post,
another USPS First-Class International package came to me...


These were more thickly wrapped with Styrofoam.


3mL of mixing medium had some funny metal ball
that would help to mix up the mixing medium.


These were 2g of TBN pigments


Blue Brown
 Belladonna
 Green Brown


These were MAC pigments & Fluidline


More MAC's pigments...


Blackened Blue


Blackened Blue
 Teal Brown                               Emerald Dusk

Azul Marrom

 Aqua Brown
 Blackened Emerald


Silver Storm
 Emerald Dusk


Starbucks


I am a huge fan of Starbucks tumblers.
I did my review on Starbucks Tumbler that I purchased in Korea but I couldn't pass on this one. It was a real eye-catcher.


This one was probably the largest size of the tumbler they had
(and it only costed $14.95+tax).


If I had to complain, I was disappointed about was the fact 
that there was some dust sitting on top of the lid :(
And you have to buy the ones on display, not a new tumbler.

Also, the inside was plastic so I could not carry hot beverages around.


I'm trying to show you how tall this tumbler was. Can you tell?


I'm satisfied with this tumbler because now I can carry larger amount of beverages.
(And I'm showing off my Canadian Fiction novels because...I bought them too...?)


Anyways, that's end of my haul. I still have lots of pigments to come (I ordered more a week after purchasing those) so please check out www.thebodyneeds2.com or follow me  for more pictures and make-up tutorials with these pigments!

xoxo
cynthia.