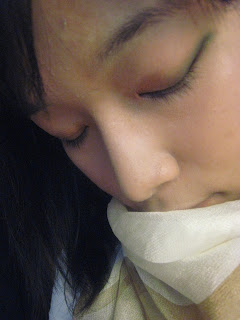
Hey darlin'! As I posted in Tutorial Preview, I was thinking of posting a look that goes with the theme of Fall and I said I came up with this copperish brown look called "Trip to El Dorado".
However, I erased all photos by mistake and decided to post a new make-up tutorial named
"Jade Garden".
Step 1
Apply any eye primer all over your eyelids (I used Urban Decay Primer Potion).
This step is optional but it helps your eyeshadows to last longer.
Primer Potion definitely gives a natural and flawless look to your eyes with the small amount of use.
Step 2
Take Missha Silky Shadow Duo in #16 and apply Glam to the inner corners of your eyes and blend it gently towards the centre of your eyelids.
Step 3
Take MAC's Woodwinked and apply it to the outer corners of your eyes.
The picture is not really showing the distinction between the two but when you apply it to your eyelids, you can tell the difference in shade between Woodwinked and Missha's orange shade.
Blend it gently towards the centre of your eyelids.
Step 4
Take Missha Silky Duo Eyeshadow in #16 once again but apply Khaki where Woodwinked was applied. Woodwinked was used not only as a guideline to know where to apply khaki (so that it would minimize the possibility of failure) but also to create that nice emerald-jade shade with gold shimmer. Blend it gently with Woodwinked and then with Glam as well (don't blend it all the way to the inner corners of your eyes!)
I first applied very little of the Khaki...
and then intensified the shade afterwards (sorry the lighting changed!)
Step 5
Don't apply any blush since the centre of attention needs to focus onto the eyes, not cheeks.
For the lips, I wore lip balm and Revlon Super Lustrous Lipstick in #750 Kiss Me Coral.
Hello there, my crushed lipstick!
Anyways, gently blot it (yes, don't apply it as you usually do but blot it so that very little amount of the lipstick would be applied. Then, blend it to your lips so that it looks very natural but not to the point where you look sick.
And this is the final look...!
And this is the final look...!
I hope you enjoyed my tutorial and please follow me if interested in further product reviews and tutorials. Thank you!
xoxo
cynthia.
_________________________________________________________________________________
Products Used:


No comments:
Post a Comment
Please leave a comment.